- New - A guide to making a Pistol/Gunslinger Build
- New - A guide to making a Melee Build
- New - Scav Magazine - All locations and details
- For New Players - Read the walkthrough.
- New - Open Season
- New - Power Play Quest
- New - Raider Outposts
- New - Nuka World Endings Guide - Options and Benefits
- The Grand Tour
- Faction Perks and New SPECIAL Ranks in Nuka World
- Gage (Companion)
Fallout 4 Automatron DLC Quests
Walkthrough: Restoring Order and Mechanist Outcomes & Choices
 Like any good lair, the Mechanist's is not very obvious. This walkthrough describes the options and outcomes you can choose when dealing with the Mechanist.
After having given Jezebel a body, the Sole Survivor is ready to install an M-SAT on a robot in order to access the Mechanist's lair. This part of the DLC actually has multiple outcomes and options for the player, and does have some replayability because of that. Since you're reading this, I suppose you might want to know the various options so I'll explain the differences here so that you can select the one that suits your needs as a player. I have kept story spoilers at the bottom and with minimal details (primarly focused on gameplay changes) so that you can see the various ways that you can make this play out. All three holotape locations are listed in this walkthrough if you'd like a non-violent option and have master-level hacking.
The Silver Shroud
If you have a Silver Shroud costume and hat from Hubris Comics (wiki), you can wear the outfit to get special dialog options with the Mechanist, but likely need to do this before you ever go into the hideout. Just pointing this out before the end, so that players do not go through this whole area without knowing that it is indeed possible to do so. You need to have completed the associated quest in order to do this. It is certainly easier anyway, given you will have access to upgraded silver shroud armor. You can get this quest by going to Goodneighbor and speaking to Kent Connolly while having listened to Silver Shroud Radio while near that Settlement.
The Mechanist's Lair
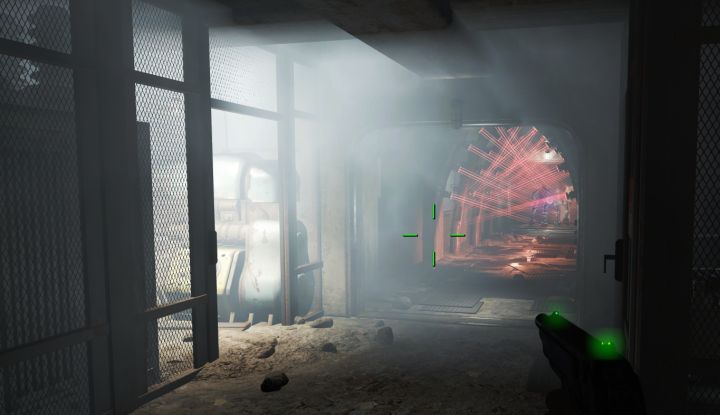 Laser Tripwires block your way - you can of course barge through them, but there are sneakier ways to do it.
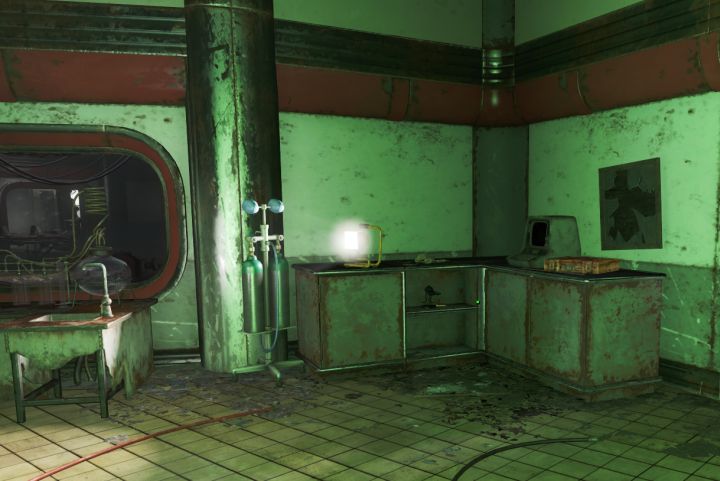
Once inside and at the decontamination room (pictured) you can choose to lockpick the right door to get some ammo. To the left, you can go through a hole in the back wall behind the fusion generator to access a security area. Three things here: an advanced-level terminal that will let you shut down the lasers (decontamination arch). The doors are already open. You can also disable turrets, though there's no point with the lasers off. Also in this room is an expert-level locked door that can let you bypass the decontamination room if you cannot hack the terminal. Lastly is a master-level elevator terminal that can be hacked now, but will not do anything due to the security lockdown. See the very bottom of the article if you wonder what this does, as it contains minor spoilers and I generally don't get into story in these walkthroughs. If you can neither hack nor lockpick (and your companion can't), then you must step inside the chamber. Doors will close, and 4-5 turrets will attack you and alarms will sound. Take out the turrets and the doors will open.
 The Lead Engineer's Holotape, part of a peaceful ending to the Mechanist Quest chain.
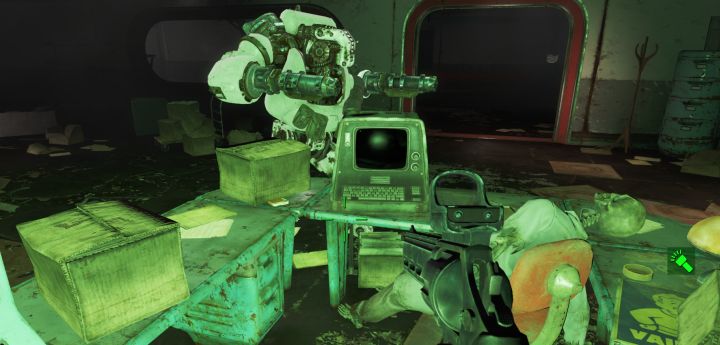
Given it's the Mechanist's Lair, you should expect some resistance at all times moving forward. As you proceed, keep an eye out for holotapes for the Facilties Manager, Head Scientist, and Lead Engineer if you want an alternate ending. Past the Robot Storage room (with two Protectrons that are hackable and can be activated to kill for XP/scrap), you should next head into Quality Control. There you can find the Lead Engineer's holotape, (who is a skeleton holding a Nuka Cola Quantum.) that you need to access the elevator near the beginning along with the other two you'll find later.
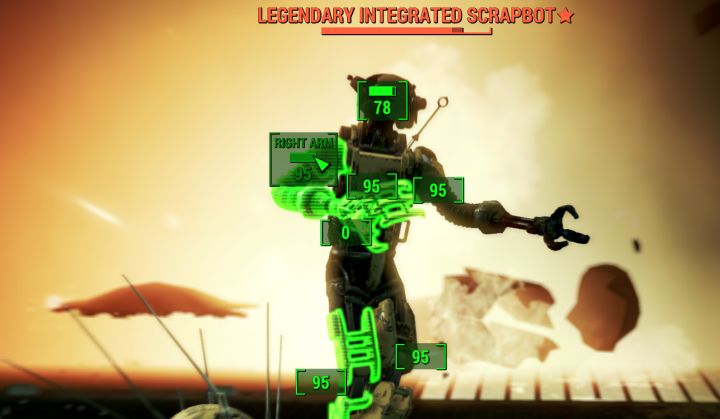
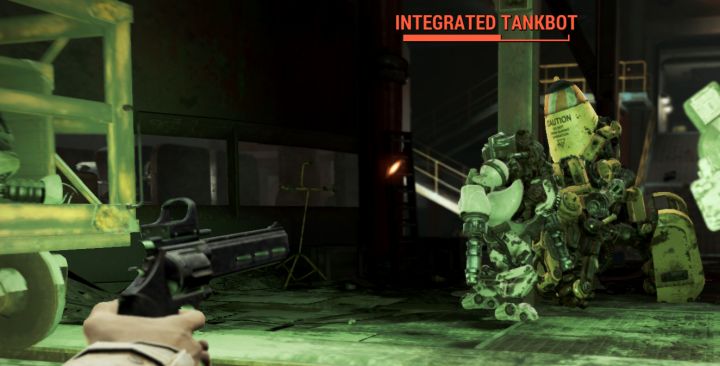 A Tankbot in the Assembly Line area. It is one of many robots you'll face as you navigate this building.
In the next room - assembly line area - you will see lots of robots on overhead conveyors. Look to see if any are Legendary variants, and if so take them out - you may get a free part. The others can be killed for XP and scrap as well. You'll be ambushed from the far door by a few easy bots, though the last was a tank and did have a self-destruct that was quite dangerous.
You can head into the back room for some loot, but the main goal is to head up the ramps to extend it across and get to the next access port which your robot can open for you. Ahead is a locked door you cannot access, so on to the facilities wing around the corner and yet another robot access port.
 The Facility Director Holotape.
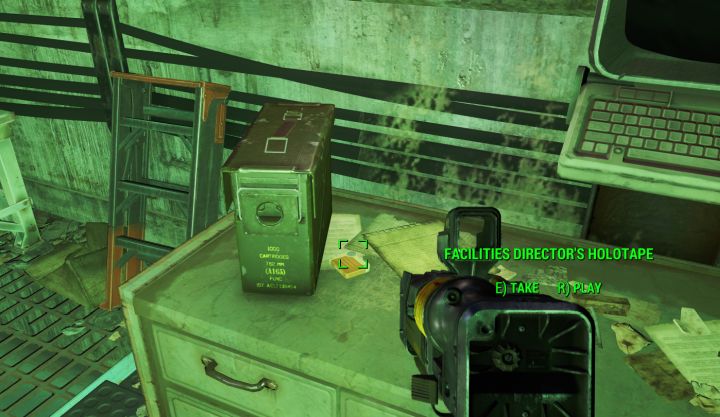
Next, head into Power Substation A but only if you want a little loot and some story from a terminal. Inside, beware the radiation if you are not using Power Armor. It's safer up top, where you can read at the terminal. Carry on toward the main path. You will come into a large room, where you can find facilities management far toward the right corner. On the desk there beneath the terminal is the Facilities Manager's Holotape. Continue to the back of the room, and use the button on the platform to cross to the Research Wing, where you'll again need Ada to do her thing with an access port.
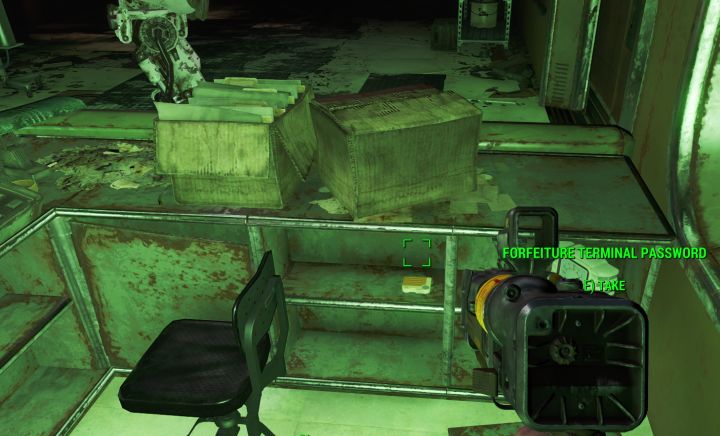
 The Forfeiture room is great and chock full of ammo and other loot.
Once inside the research wing, you can find a forfeiture terminal password behind the desk. Going in here is optional but highly recommended. There are several ammo boxes, and tons of goodies to be collected. Without that password, you'd need to be a master locksmith.
Carrying on to the labs, you'll find yourself in a cell block full of advanced locks. While you can open all the cells at once with a switch at the end of the hall, be aware that some of the ghouls here are just in slumber. Kill them from behind the bars as you go, for you must flip this switch in order to proceed to the next elevator.
 Chief Scientist's Holotape is found in this lab.
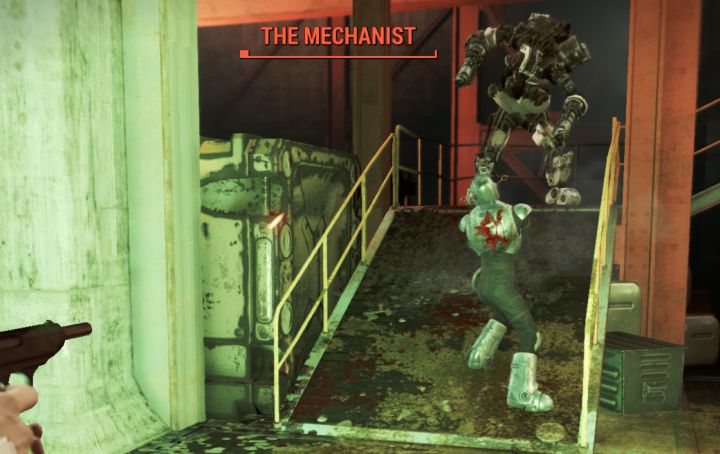
There are multiple labs here, which can be investigated for some scientific/medical loot. Inside Brain Extraction you can find the desk pictured above, which has the Scientist's Holotape - the third and final one to get an alternate ending for the Mechanist Quest (see options below if you want to proceed with the non-violent route). If we want the Robobrain Assembly/Incenerator to proceed. A really rough fight takes place here, with a Robobrain, two turrets, assaultron and a couple of junk robots. Given the ease with which you move for a while and the feeling the place is deserted, it can be a dangerous ambush. The Robobrain will drop a Medical Terminal Password item, which is used on the terminal on the left wall (from the entrance). From here, you will be in the Mechanist's main room, in which the boss fight occurs.
Mechanist Options & Outcomes
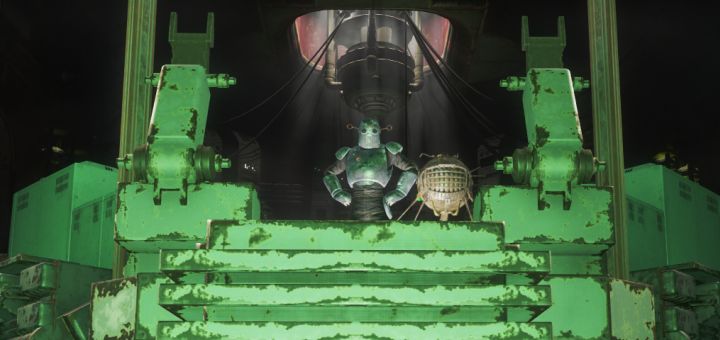
 The Mechanist in the Fallout 4 Automatron DLC. The final fight is challenging and fun. I recommend you try it sometime even if you go the peaceful route.
Fighting is Definite unless you use the final option, which is to return to the beginning and pursue the completely peaceful outcome. This would be a good option on a very high-difficulty game, especially with a melee build given the intensity of the fight you face here. Most players should have no trouble, you can save just before the door and quick-save in between waves. I do recommend it, as the order to the eye-bots to self destruct can be dangerous, and the amount of explosives in the room. Additionally, the stronger bots will also self-destruct. You could seek the high ground in order to make the fight a touch easier. Look for enemies to come from all directions in later waves.
The Silver Shroud Quest having been completed beforehand can result in different dialog but the same outcomes.
 Killing the Mechanist will get you the helmet and costume, but so too will the peaceful route.
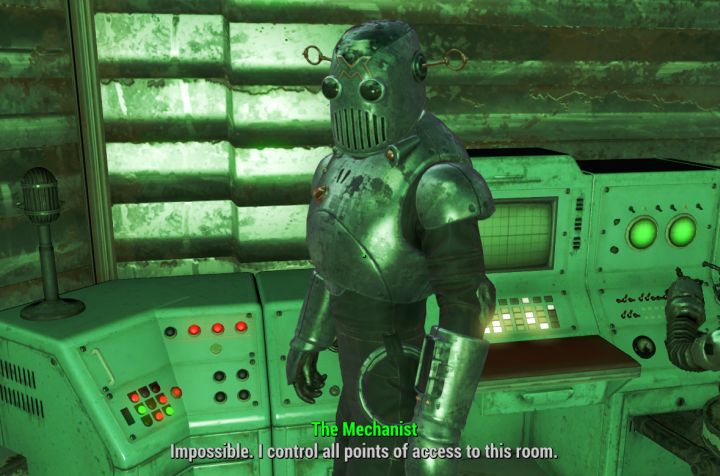
Option 1: Dish Justice and Kill the Mechanist
You can be mean to the Mechanist, but you will never discover who they are or how things went the way they did unless you abruptly kill them toward the end of dialog. You can definitely convince them to talk, then turn on them which is dirtier but a bit easier than a straight up fight. The Mechanist will use stealth-boys, though Ada or another bot may help you to pinpoint their location. With the Mechanist dead, you will get their helmet, outfit, and access to the facility.
The only truly unique reward for killing the Mechanist is the Protectron's Gaze legendary weapon, which can be pickpocketed from a living Mechanist with the rank that allows weapon theft. It's hardly unique in that it is a laser pistol with the Rapid affix, meaning it fires/reloads faster. One other small benefit of killing the Mechanist is that the radiant quest you unlock after this, "Rogue Robot" will be easier as you can get a new quest any time with Ada as your companion. With the Mechanist giving you the quest, you will have to return to the lair to get another (though they do complete automatically). With Ada as a companion, you can immediately speak to Ada after completing one and she will locate another for you!
 Talk it out with the Mechanist without being aggressive for the best outcome.
Option 2: Talk it Out with Mechanist
Talking things out with the Mechanist, which can only occur naturally after the fighting, does not require any speech checks to be passed though you must avoid challenging them to a fight. This is the best way in my eyes, given you get great XP, scrap from the fight, and an explanation which I will not spoil here. You should also end up with the costume this way, but not the gun.
 A peaceful outcome with the Mechanist, without fighting - I wish more Quests in Fallout 4 had options like this.
Option 3: With all Holotapes AND Master Hacking - Peaceful Outcome
Return to the entrance, to the master-level elevator. It is not nearly as long a journey as it seems given the lack of fighting and that you have looted everything. Hack the terminal, then proceed to load the three holotapes one by one: Chief Scientist's, Lead Engineer's, and Facilities Director's. This will override the security on the elevator and let you descend. You will get the same dialog (after a point) that you get after winning the fight against the Mechanist's bots, along with all the same rewards.
Control the Facility
You should loot everything here, take over the workbench, and find schematics to various types of robots. By the time you're done it seems you have access to all types, but many robots roam the Commonwealth and are out of control. At this point you've finished the main content of Automatron, but the gameplay ramifications remain. Next, see After the Mechanist, Eyebots & Rogue Robots to learn about all that comes after completing the Mechanist Quest and more detail on what you can now do.
More Fallout 4 Guides
Share Tips and Strategies Below
- Raider Outposts in Nuka World
- Nuka World - Play as a Raider in this DLC
- Far Harbor - Learn about the DLC, its secrets, and read walkthroughs
- Automatron - Guides to building bots and quest walkthroughs
- Settlements - An in-depth guide to Settlements and managing them
- Melee Build - the best perks for a melee character
- Sneaking - Learn to be stealthy
- Critical Hits - Shots to Crit and Crit damage mechanics
- Tips for Making a Build - General advice for creating your own build
- Action Points - AP and all the things that affect it
- VATS - all about the V.A.T.S. and AP usage on weapons
- Gameplay Tips - pointers that will help new players
- Making a Sniper Rifle Weapon mod examples. Heavy hitter and fast-firing Comparison - two guns from the same base.
Share Tips and FAQs (6)
Join In