- New - A guide to making a Pistol/Gunslinger Build
- New - A guide to making a Melee Build
- New - Scav Magazine - All locations and details
- For New Players - Read the walkthrough.
- New - Open Season
- New - Power Play Quest
- New - Raider Outposts
- New - Nuka World Endings Guide - Options and Benefits
- The Grand Tour
- Faction Perks and New SPECIAL Ranks in Nuka World
- Gage (Companion)
Fallout 4: Settlements
Tutorial for Managing, Building, and Optimizing Towns
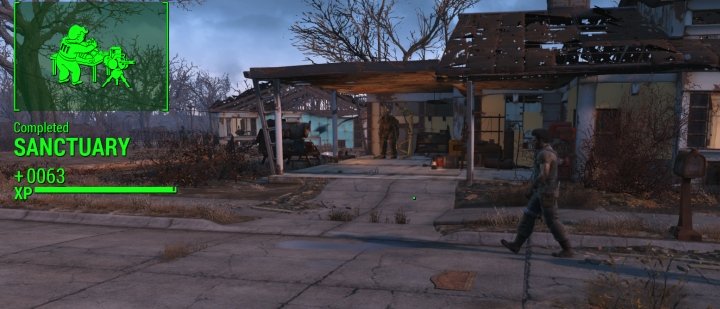 Sanctuary is likely to be your first Settlement. Building it up by completing the quest will result in a lot of XP and resources to help your character progress. The Settlement component of Fallout 4 is strategically helpful and improves the game's immersion.
Fallout 4's Settlements system is a key part of gameplay. You can ignore them, but rallying the people of the Commonwealth and improving their lives is a core idea in this game. They don't tell you much in the beginning. You're suddenly given the ability to build things in Sanctuary, so I'm going to go over some of the factors that make a Settlement: water, power, happiness, and defense. We'll also teach you how to manage your Settlers.
Here are the things we'll cover about Settlements. Jump to the section you need help with or scroll down to learn the basics:
- Basic Things to Know
- Population Cap and Charisma
- Getting Started
- Beds
- Food
- Assigning Settlers to Garden
- Water
- Happiness
- Power and Wiring
- Lighting the Town
- Recruiting New Settlers
- Scavengers
- Brahmin
- Establishing Supply Lines (Local Leader)
- Defending the Settlement Against Raiders
- Settlement Size Stat
- Building Up New Settlements with Supply Lines
- Benevolent Leader Achievement
 You can't order Preston Garvey around right away, but later can assign him to guard duty - a task he's well suited for. Garvey will give you quests to get you allied with new Settlements.
The Basics - Settlement Management
Enter the Settlement Management screen by holding the button you use to change views from 1st to 3rd person. From there, you can see the Settlement's stats - people, food, water, beds, electricity, and defense. Each of these impacts something, and improves the quality of life of your Settlers and their Happiness - the final stat. A safe place with food and water is hard to come by in post-apocalyptica, so if you can give that to them, they'll be happy. Lastly, there is a bar that indicates how full the Settlement is as far as objects go. It is up to you to manage the people and assign them to tasks in order to give the Settlers a productive and safe life.
See All Settlement Status: You can see the status of all your Settlements by using your Pip-boy to go to Data > Workshops
Building Materials, Junk, Food and Water all go automatically into that Settlement's crafting stations. Some, you'll have to deposit yourself. If you have an item like an aluminum can in the storage, it'll be automatically broken if you need aluminum with the excess left behind in storage as raw materials (3 left if it provided 4 and you needed only 1). It's a slick system.
Storing Junk - Select the workshop station and store all junk to have all items that qualify as junk automatically deposited, freeing up your inventory. Many items' only purpose is to provide materials - like desk fans and bottles. When you're building, you have access to all of these materials - whether for crafting or weapon/armor modification - wherever you are in the Settlement.
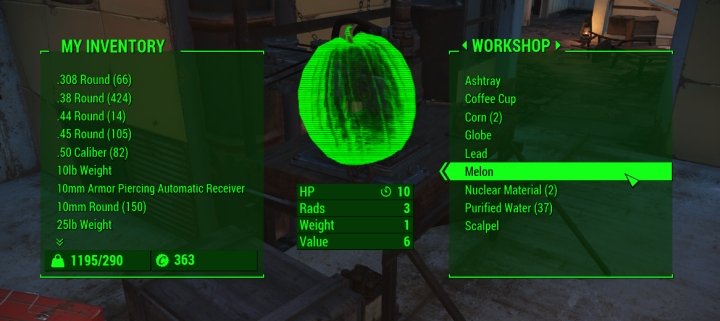 Having abundance and scavengers means free materials. These were all deposited after a few days, resulting in extra materials gained while adventuring. Your Settlers work for you!
The Benefits of Building Settlements
Some may choose to ignore this aspect of Fallout 4, but it's not necessarily a good idea. You can get a ton of free items by building up your Settlements, and eventually have easy access to great stores that let you buy ammo or sell your items for money. You can even set the fast travel spot for a Settlement and pop up right in front of crafting stations and stores if you've taken the Local Leader trait.
Setting up Supply Lines, you can have access to all resources in one settlement at another one when using the crafting stations, so you can upgrade/improve things in smaller Settlements without carrying around building materials. For you the player, this also means lots of scavengers working for you, free water and food! The more extra food and water you have when compared to the population of a Settlement, the more will be deposited. You need to remove excess water and use it or put it in another container, but excess vegetables and scavenged items will continually accumulate. This is a good reason to make way more water and food than your Settlement really needs. These items can be used to cook and purified water is worth a good number of caps.
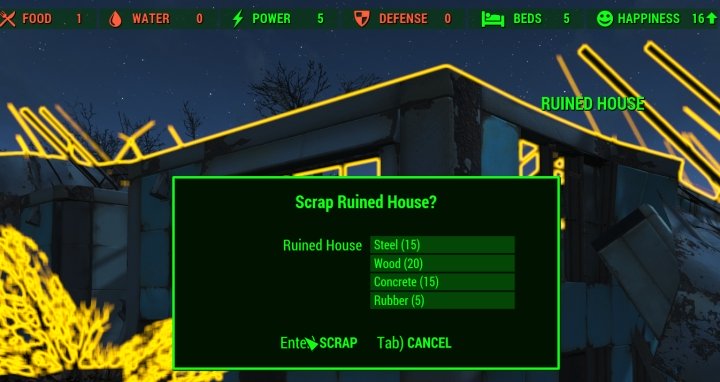 Scrap ruined buildings to get Steel. Get wood from trees. Other less common materials can be found all over town inside the houses.
Getting Started
You can go about the Settlement and destroy ruined houses and trees - downed or logs - in order to get the most basic resources - steel and wood. You can also go into homes and look for broken objects to scrap. You don't have plumbing, so you don't really need toilets and broken sinks, nor children's toys and couches can't be slept on. Spend some time doing this to build up your resources, but DON'T scrap light poles. You can use them to hang light bulbs later. You can take these resources to ANY crafting station, even the cooking station, select store all junk, and the whole Settlement will have access to them while freeing up your carrying capacity. This is key, because how can you lug around 100 steel, lumber, ceramic and other materials while still managing to hold your own in a fight after traversing the map!
While you can build custom houses, making things pretty isn't my specialty. It's something you may want to do eventually in order to make it more pleasing to the eye, but I focus on the basic stats and think that is the main thing people need to know. You ARE able to make things entirely custom, and magazines out in ruined buildings may teach you to make things like patio furniture and other decor in your Settlements.
Settlement Population Cap
Settlers will gradually come in so long as your Settlement has a recruitment beacon working, and you've got an abundance of at least a few of the things listed below. If the Settlement is unhappy, no one will bother to come. The Settler Cap is 10 + Charisma. I've had my Settlement size pass my Charisma, because often I've used hats/suits to raise Charisma while in town and shopping at my own stores. I have NOT seen it go down, though I've seen it reported.
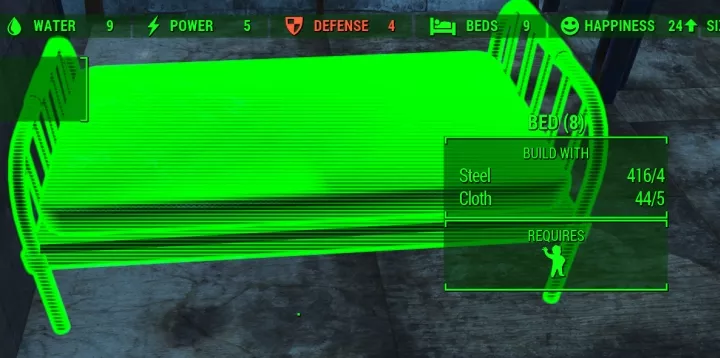 Settlers want beds to sleep in. Can't blame them.
Beds
The best thing to do is use the homes you can't destroy and put beds inside them. The only things I didn't really tear down are street lights, as they can come in handy to light an area in the street later in our building process. I placed beds in what were obviously once the bedrooms after scrapping everything inside. Along with food, which we'll cover next, people need beds to be happy. You must have enough beds for your population - one for each of them - and one for yourself (optional). If people passes the number of beds, happiness will drop. You can assign settlers to specific beds, but it doesn't really matter. This is purely about the stat. Having extra beds will not necessarily attract new settlers, but it will prevent those who move in from lowering your Happiness stat when they arrive.
You can make beds by going to Furniture > Beds in the Settlement Management screen. People don't even need to be able to walk up to them for this to work, but it looks awful if you lay them side by side and you may want to use one here and there to get the Well Rested buff. You should be able to provide plenty for the initial settlers just by breaking down the things in Sanctuary's ruined homes. Settlers are just as happy with a mattress on the floor as they are with full-sized beds.
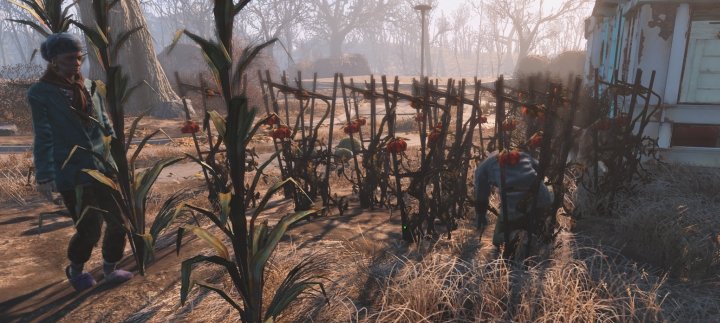 Settlers will produce food, should you build a garden or have Brahmin. To make a garden you must first find food that is plantable, like Tatos.
Building a Food Supply
This is a major factor for the success of your Settlement. Without enough food to feed those who are around, why would someone else want to move there? You can collect plants from all over the world - mainly at other towns in existing gardens - and plant them. Harvest them when they grow after a few days and replant them in order to be able to expand your food supply, and be on the lookout for foods that can be grown as you travel. Really, just pick up almost everything! For the plants in your settlement to grow, you must assign a Settler to the task.
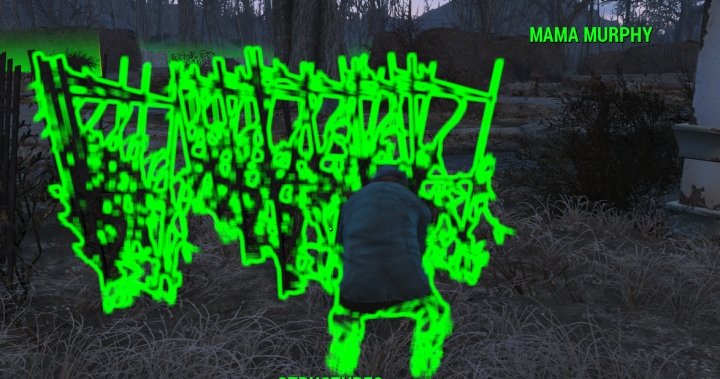 She doesn't need Jet. Just get her working in the garden to take her mind off the withdrawal. You can see she's working quite a lot of plants at once.
Assigning Settlers to Garden
First, plant the produce in rows. Harvesting vegetables from other places isn't considered stealing. You're most likely to have 'Tatos and melons early on, if you're following Preston Garvey's quests to restore the Minutemen. With the Settlement Management screen open, go to Resources > Food and select the types it says you have on hand. Plant them in rows. Now, select one of the Settlers. Don't put Marcy Long on this because she's such a rude bitch that you want her on the front-lines if raiders attack. It's a good job for a struggling drug addict, so how about Mama Murphy?
You need some fruit and vegetables to get started. You can find some by simply doing the quests offered by Preston Garvey. He will send you to a couple of small villages that need help in order to get you started. Don't worry if Sanctuary is technically starving for a while. You can pick produce at these Settlements without it being considered stealing, then plant them when you get back to Sanctuary Hills and begin assigning Settlers to grow them for you.
In Settlement Management, click a Settler then go to your garden. Pick 'assign' with a plant selected. It should say, "This Resource has been Assigned". One Settler can work up to 12 plants or 6 units of food - depending on how many food that plant says it produces. Most produce half a unit, hence the 12. Mutfruit is 1, so a Settler working 2 mutfruit could also work 8 tatos (to reach 6 food). If you start with 5 half food plants, then later plant 7 more, the Settler will automatically take up responsibility for those other 7 plants. Great, huh?
Thankfully, you don't have to choose between Food and water since they take completely different resources to craft. When you harvest vegetables, please note that they are not stored like other junk in your Settlement inventory. Lugging around 30 Tatos and 20 Mutfruit is a lot, so put those along with any wild animal meat you've collected into your Settlement's workshops manually. You can then use it at the cooking station there, and later at other Settlements if they are connected via Supply Lines. Excess food is regularly deposited into the Workshop's inventory, where it can be used for cooking or planting in future Settlements. You can even sell it if you get hard up for caps. Don't go overboard though, you want more Settlers working as Scavengers and only need that 1 food per Settler. Shoot for 20-25 food tops, unless you get a higher population.
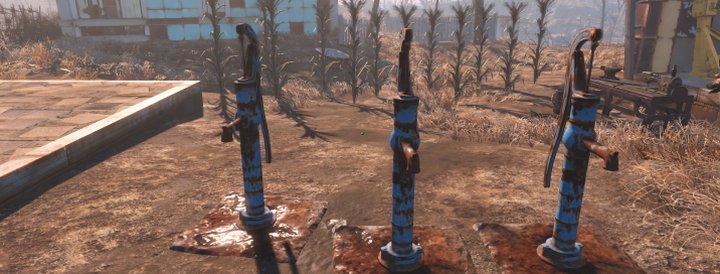 Regular water pumps are fine, and with an abundance of them you can get some Purified Water - a great healing item and useful for crafting. Settlers require water to be happy and attract newcomers.
Water
Now your Settlers need a good water supply. You can choose normal pumps which go in the dirt or purification stations. Water needs to surpass the amount of Settlers, and the higher it is the happier they will be. Maybe they want to actually bathe. Water Purification stations are great, and can be put in the stream near the bridge, but you'll need a power generator to do that. Normal pumps are easy enough to place, so I'll assume you have the stuff you need to make one in the water so I can teach you just a bit about wiring.
Like food, water is regularly deposited into the Workshop inventory based on the amount you have. However, unlike food, it is OK to go overboard with this - Settlers don't work your water pumps. Water will be deposited into your Workshop inventory regularly, every 30 minutes to 1 hour, and you can use it to heal or sell it for caps.
Settlement Happiness Factors
Happiness is the measure of your Settlers' contentment with these inter-working systems and improves their efficiency. In particular, you'll get more excess food and extra scavenging resources the happier your Settlement has become. Having enough food, water, and beds are obvious, but what else affects Happiness? Happiness can be raised by ensuring no Settlers are unassigned. While we do not yet have a list of all Settlers and the roles they're assigned to, you can do a patrol around the Settlement and look for Settlers who do not have a job by looking at the icon. If it's red, they have no job. Different symbols represent different jobs. Assign them to scavenging stations if you have the food required to feed your Settlers. The rare materials you'll occasionally get are better than more food, and the higher your food count, the greater the chance of a raider attack.
Little things like the random encounter with a wasteland resident who will sell you a dog can give you extra happiness - the Settlement it's sent to will get a small boost. Having the shops you can build/purchase with Local Leader rank 2 (Charisma Perk) will greatly improve happiness. Decorations and lighting have no impact on happiness at all, though maybe this will change one day. Adding additional shops does affect Settlement Happiness.
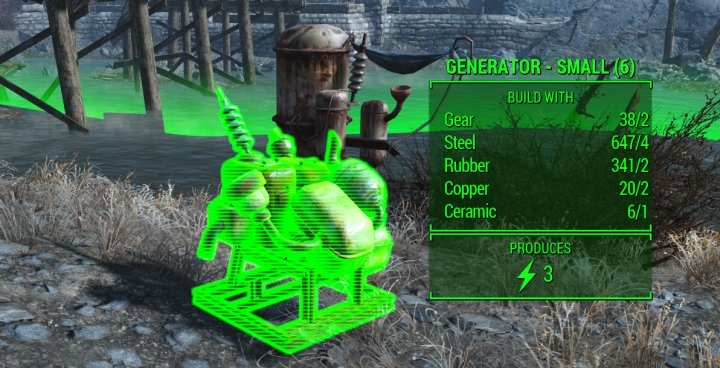 Powering your Settlement is necessary for water purifiers, lighting, the recruitment beacon and some defensive items. Press the jump button to attach wires to other objects, extending the generator's' reach.
Power and Wires
I say 'Stuff' because you have many different things that can be wired, from certain defense systems to poles that allow you to extend them. See, wires have a limit on how far they can go. So if you're putting a purification pump in the stream, you should put the generator nearby else you need to use more resources putting up power poles on which to hang wires. The taller ones let the wires go further. On PC, I select the thing that needs power, press space, and it allows me to then attach a wire to the generator or power pole. On Xbox and Playstation you should see the necessary button on the bottom of the screen when selecting the object that requires power. You may need to make several hops to wire something distant, which is why I recommend just putting generators nearby. Poles aren't necessary in some cases - you may have a light source that needs power, and can then hop a wire from that to the next thing.
So this brings us to the Power stat. This is a largely useless stat unless all of your items are connected via wire. Early on, it's a generator feeding a water purifier or lighting, and knowing the amount of power isn't that important. Just be sure your generators are adequate for what you're hooking up. If it doesn't help happiness, it's too bad it doesn't just show you how much extra you have minus consumption. Regardless, this metric is nearly pointless as you should keep track of how much is needed to power your purifiers, defenses, lighting, etc. based on the power generators' output.
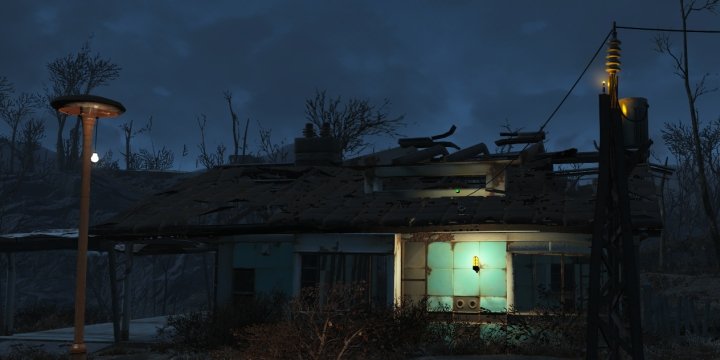 Lighting up Sanctuary or any other Settlement is as easy as placing some lights near a power pylon. They give off an aura of electricity, as do conduits. Wire conduits to homes to give them power inside!
Lighting
Lighting is not necessary at all, but does improve the look of your Settlement and may help during a night-time raid. You need light to see to fight effectively and navigate the town. It makes it look like a booming town rather than a bunch of run-down shacks. Look to Power > Connectors and Switches and note Power Pylons and conduits. Both of these emit an aura that will allow a home or street to be lighted. You can connect either to a generator, hopping with wires as necessary, and the lights will just 'work'. Switched Pylons/Conduits will let you turn them off if you please, but they're hardly necessary. If you're short on power, prioritize this later than other things.
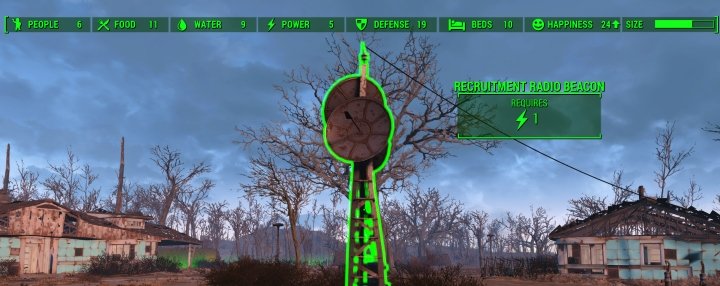 The Recruitment Radio Beacon is necessary to attract more people to your village. Don't be like me. Turn it on after supplying it with power from a generator.
Settler Recruitment: The Radio Beacon
Recruiting people to the Settlement requires the Recruitment Radio Beacon. It must be connected to your power grid via a wire. Build this in each Settlement as soon as you can, because more Settlers (who have no names but can be used for a number of things) is a good thing and helps make your town more defensible. Basically, without this radio beacon, how would you get the word out that there's a good place to live in the area? Towns that welcome newcomers and offer food and protection are rare in the Commonwealth. Once you've built the settlement recruitment beacon, please make sure that it's switched on by activating it outside the build mode! Afterward, when you're listening to the radio you may hear mention of your little project to build a nice town.
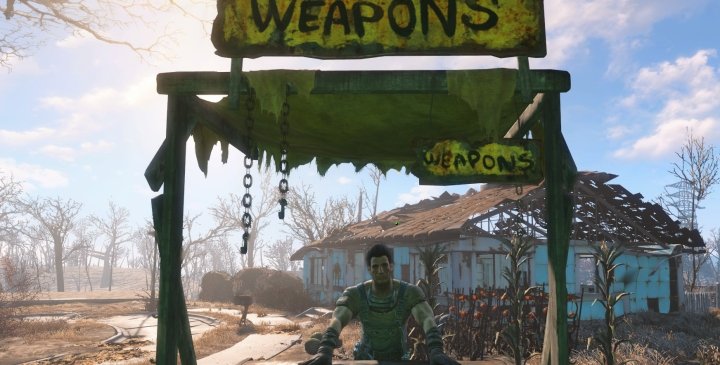 With some caps to invest and Local Leader rank 2, you can make shops in your town so you can sell goods and buy ammo! Sometimes rare things will be for sale, so this can be a major perk. I think everyone who bothers with Settlements should take it.
Scavenging Stations
Scavenging Stations require a Settler be assigned to them. While unassigned Settlers may find one item, Settlers assigned to Scavenging Stations find twice as much and are happy to have an assignment. You can build a Scavenging Station by going to Resources > Miscellaneous. These dutiful townsfolk will randomly deposit items they find into the Settlement's crafting stash. This happens every few days, and you never know what they'll find. It's always materials, but it can be some really good stuff, especially as your level raises.
Scavenging Stations are entirely optional and should probably come last in your priority list as far as assigning work duties, but is the best thing to do with extra Settlers once their basic needs are taken care of - 6-8 Settlers on Scavenging Stations can produce a lot of materials for building other Settlements and modifying your weapons and armor. It's one of the best parts of using Settlements in Fallout 4. Read the article linked above to get an idea how powerful this can be with supply lines.
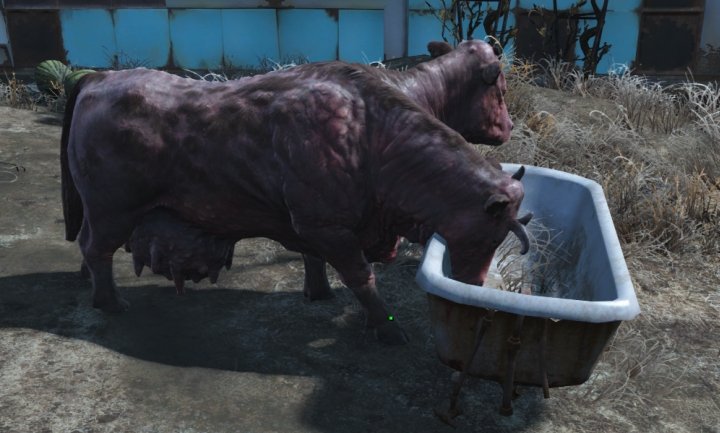 Brahmin do have a purpose in your Settlement. They provide you with Fertilizer, which is used to make Jet and explosives at the Chemistry Station. You can find this in any workshop's inventory in your Settlement. Having these in many Settlements will give you nearly unlimited Fertilizer.
Brahmin - Feed Troughs and What Brahmin Do
Attract a Brahmin to your Settlement by going to Resources > Miscellaneous and building a Brahmin Feed Trough. Having Brahmin in your Settlement does not contribute to food, nor should you kill them - you'll aggro the whole town. Only wild Brahmin may be slaughtered for meat and leather. Brahmin in a Settlement generate Fertilizer in the workshop's stockpile automatically. Fertilizer is great for people who like explosives, as it's used in a number of chemistry station craftables. Additionally, it's required to make your own Jet.
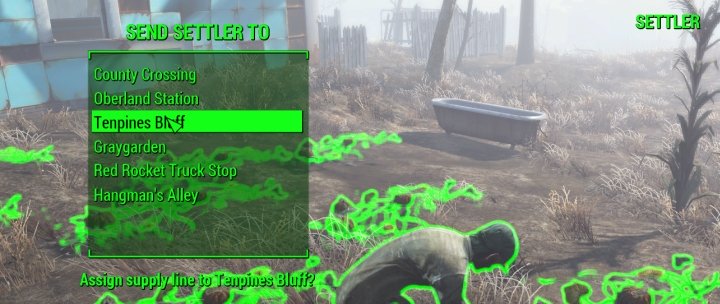 Establishing a Supply Line - you must pick a Settler named 'Settler' or some other non-critical NPC to do this, but it will give you access to resources across connected Settlements.
Supply Lines and Local Leader for Settlements
With the Local Leader Perk (Charisma 6), you can establish Supply Lines. This can only be accomplished by selecting someone who is named simply 'Settler'. Pick them with the Settlement Management screen open and you can then pick establish supply line. Tell them where they'll go. You can make networks of supply lines in this way, and have access to all building materials at all Settlements. It's incredibly useful for building up new towns, and you can even have access to your weapon/armor modification items at these crafting stations as well, so it can save you some significant travel time, especially if you were playing on Survival difficulty.
Settlements with excess food and water will share with the other Settlements they are connected to, though this will not be displayed at the connected Settlement. It may show 0 food, but the people could be fed if food is in abundance. Your total food/water production in each settlement can be subtracted from the amount of Settlers you have. This means some Settlements do not need many farmers or even water pumps, so long as they are connected by supply lines.
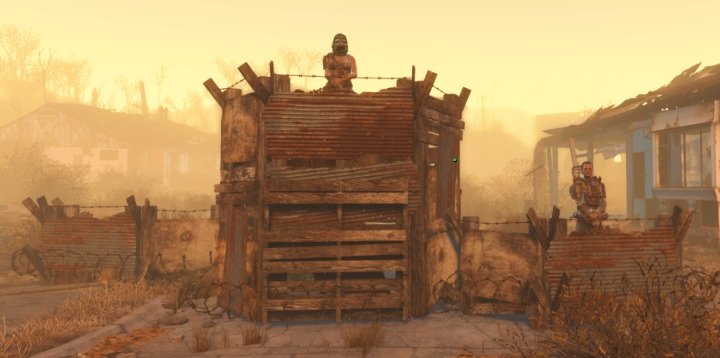 Settlers assigned to guard the Settlement. Be sure to give them good gear so they can survive combat.
Settlement Defense Stat
Defense is a key aspect of happiness. The wastes are absolutely ripe with rape and pillage, so people need to know they're safe. You can achieve this with guard posts and automated gun turrets - some simple ones do not require power and can absolutely butcher Raiders with your help and that of the people you've chosen to be defenders. Note you can't order Preston Garvey around until a little later in the quest, but can eventually assign him to this task.
For Sanctuary, the main entrance is the bridge although I'm sure they can come in from elsewhere. You need to build guard posts - the tall one being best, along with a couple of turrets. The higher your Defense, the less likely it is to be attacked - especially if you have a high food/bed/water stat and low defense - that will absolutely attract attackers.
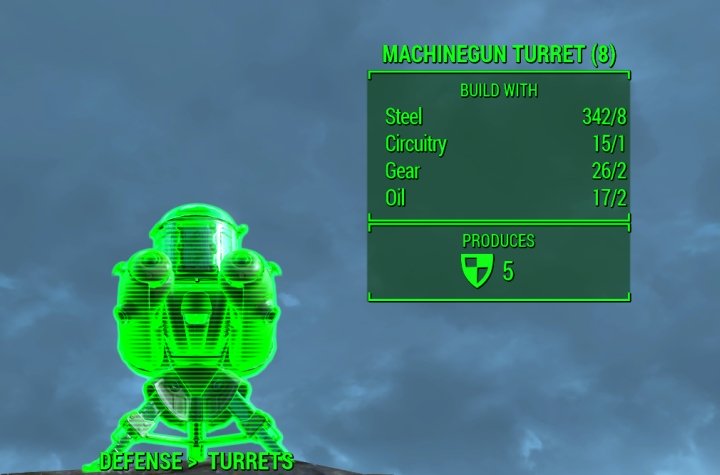 Defense Turrets won't 'die' like settlers will, they just may need replaced. They provide a good amount of defense. The basic ones do not require power. Put them up as high as you can for maximum effect.
You assign Settlers to defense positions just as you do gardening and other tasks. Each Settler can guard 3 posts, which means if you have the materials you can get a good defense rating straight away and greatly reduce risk of attack. But there's something worth noting here. You should gear up your guards, and not rely on just one! Give them items better than pipe pistols. Always give them your hand-me-down armor as you get new stuff, and occasionally upgrade it for them with stats like damage/energy resistance. Everyone in town will give you full access to their inventory, and you can choose to equip an item you've given them. Note there are clothes that cover the full body, then 2 pieces for arms, legs, and chest - so 6 pieces total, along with a weapon and ammunition. I don't know just yet if they'll use Stimpaks, but it's not a bad idea to give them some.
Every Settlement needs defense as it grows. Raiders want your resources, and they will come after them. The higher your food/water ratings, the more likely they are to attack however defense can lower this chance. Regardless, there is a small chance of attack each day. You may need to repair defenses and other objects from workshop mode if there is a bad attack with collateral damage. You will be notified if a Settlement is under attack and have time to fast travel to it. People may die, and happiness could go down and need to slowly rise back up after the attack. One of the only limiters to this is Size, which determines how many objects can be placed throughout the Settlement. Some have more room than others, based on existing structures.
To reiterate this from earlier in the guide, Settlement Defense needs to be higher than Food plus Water combined. The higher you raise defense, the lower the risk of attack. Getting defense to 100+ is a good goal for all your Settlements to prevent random attacks. This can help prevent annoying defend X settlement quests that come up at random, but will take a lot of oil and circuitry because the best way is masses of Turrets. Your scavengers and selective looting when adventuring can help you to have enough resources to do this.
Defending Settlements Under Attack
Occasionally, one of your Settlements will come under attack. You'll know this because Help Defend X Settlement will appear to the left of your screen as though you've got a new quest. If you forget which one it was, because you were wrapping up another quest, you can view these on the Quests tab in the Pip-boy under Miscellaneous - it will indicate which Settlement needs your help. They must have good scouts, because you do have some warning before raiders/whomever attack the Settlement. The attack usually begins shortly after your arrival. If you wait too long, some infrastructure will be destroyed, some Settlers may be lost, and as a result Happiness will drop - so choosing to ignore these is an option, but not entirely recommended. Avoiding The Castle and Preston Garvey can help you get less of these missions.
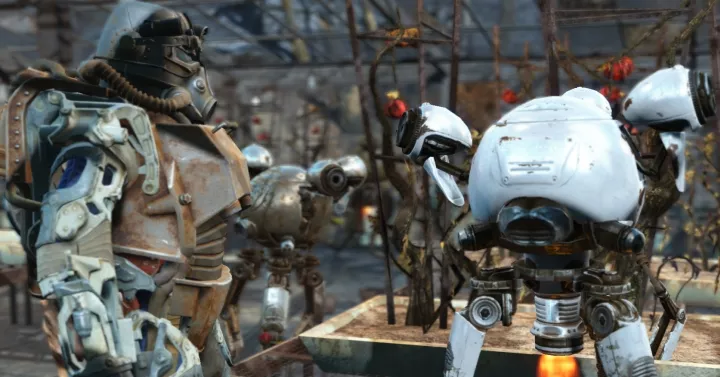 Completing quests may lead to new towns offering to join you, allowing you to establish more supply lines and get more free resources.
Abundance and Making More Settlements
There's a lot more to the Settlements sytem, but you should be able to gradually improve your towns as you find more materials while exploring. As you go, you'll notice that excess food and purified water are deposited into the crafting station for the Settlement. Stated before, but take the purified water out of the settlement's inventory and put it in a normal container if you want even more to accumulate - there is a cap. As you advance in the game, Preston Garvey will give you quests to help other Settlements. After completing said quest, you will govern them the same way you do Sanctuary and add them to your Commonwealth 'empire'. You will also run across places that Garvey doesn't mention that will join you if you offer them some help with a local problem. You can actually civilize the wastes in Fallout 4.
The Size Stat - What It Means
Each Settlement has a maximum amount of objects that it can hold. Therefore, later on it's better to have only necessary things and replace smaller things - like generators and water pumps, with more powerful generators and industrial water purifiers. These will lower the total object count for you, while providing a larger output of these resources. The only thing you can't really upgrade are beds and plants. This metric is NOT an indicator of how full your Settlement is. Settlements' max populations can easily pass 20 with some time investment, and a large Settlement like this is unlikely to be attacked if it has a sufficient defense rating.
Settlements in Mid to Late-Game
As above, you want to upgrade things to improve your Settlements. Make supply lines connect to your 'capital' by having Settlers in new Settlements establish Supply Lines there. You can then immediately build some defense, water, beds, and assign workers to food when they arrive later on. Again, if you have an abundance of food and a supply line this isn't necessary to feed the new residents.
You can view the status of all of your Settlements by viewing the Pip-Boy, going to Data then Workshops. There it will show you caution signs if a stat is too low or nearly used up - like 3 Settlers with 3 beds. If none of these are displaying warnings, the Settlement will naturally grow. If you want one really good Settlement, you can tell newcomer Settlers to go to a specific town. You'll also meet people who need a home in your travels, along with Companions, and can tell them to take residence in one of your Settlements.
The Benevolent Leader Achievement
If you'd like to get the Benevolent Leader Achievement, you must strive to max Happiness. You may want to read this whether you've got an interest in the achievement or not, because I've added in some tips to managing Settlements that is beyond the scope of this tutorial. I've put this in a separate article, because it's not something you can do early on in the game and littering that advice throughout this article might overwhelm a player new to Fallout 4.
I hope this was helpful - if you have any feedback, email [email protected], whether to let me know it helped you or to offer up a suggestion for improvement.
More Fallout 4 Guides
Share Tips and Strategies Below
- Raider Outposts in Nuka World
- Nuka World - Play as a Raider in this DLC
- Far Harbor - Learn about the DLC, its secrets, and read walkthroughs
- Automatron - Guides to building bots and quest walkthroughs
- Settlements - An in-depth guide to Settlements and managing them
- Melee Build - the best perks for a melee character
- Sneaking - Learn to be stealthy
- Critical Hits - Shots to Crit and Crit damage mechanics
- Tips for Making a Build - General advice for creating your own build
- Action Points - AP and all the things that affect it
- VATS - all about the V.A.T.S. and AP usage on weapons
- Gameplay Tips - pointers that will help new players
- Making a Sniper Rifle Weapon mod examples. Heavy hitter and fast-firing Comparison - two guns from the same base.