- New - A guide to making a Pistol/Gunslinger Build
- New - A guide to making a Melee Build
- New - Scav Magazine - All locations and details
- For New Players - Read the walkthrough.
- New - Open Season
- New - Power Play Quest
- New - Raider Outposts
- New - Nuka World Endings Guide - Options and Benefits
- The Grand Tour
- Faction Perks and New SPECIAL Ranks in Nuka World
- Gage (Companion)
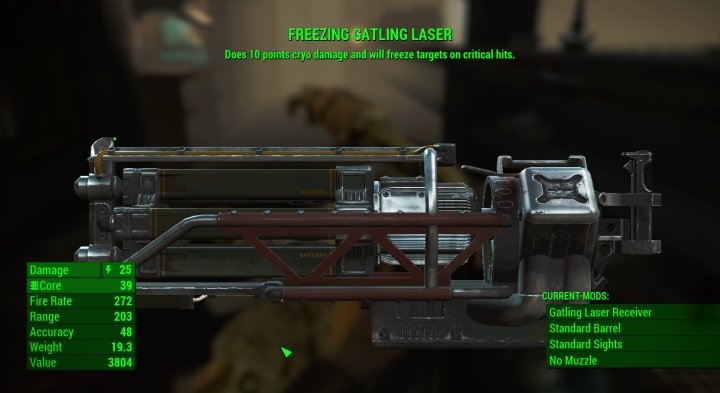
Legendary Enemies, Weapons & Armor
Fighting Tips and The Best Effects to Hunt Down
 This enemy is both Legendary and higher level. The star indicates its status as Legendary, the skull means it's higher level.
Coming across Legendary Enemies in Fallout 4 can be intimidating early in the game, but later you learn to love the appearance of these powerful opponents. Why? Not the XP. The loot. Legendary opponents almost always drop a piece of legendary armor or weapon when defeated, and it may have one of numerous affixes that boost your character's combat potential. The odds seem low, but sometimes you will kill a legendary opponent and they'll have nothing - this is not a bug. These legendary items can be upgraded just like any other, and so long as you get one with an effect that you want and doesn't dramatically drop your armor, you'll want to make use of them. This guide offers tips on defeating these enemies in high-difficulty games, like when playing on Survival or Hard and up.
 If you want Legendary Weapons, you're more likely to find the enemies that drop them when playing on at least Hard difficulty.
Spawn Rate
Legendary opponents spawn much more frequently the higher your difficulty setting:
| Very Easy | Easy | Normal | Hard | Very Hard | Survival |
|---|---|---|---|---|---|
When it's Very Hard or Survival, there is actually a chance that you'll see more than one Legendary in a single group, and every 'group' or two will contain at least one.
So, as you grow in power and enemies get easier to defeat, consider raising the difficulty. The reason for this is to give yourself more chance at weapons and armor with desireable legendary effects - those that suit your build or are difficult to pass up, such as slowing time when injured or increased damage/limb damage.
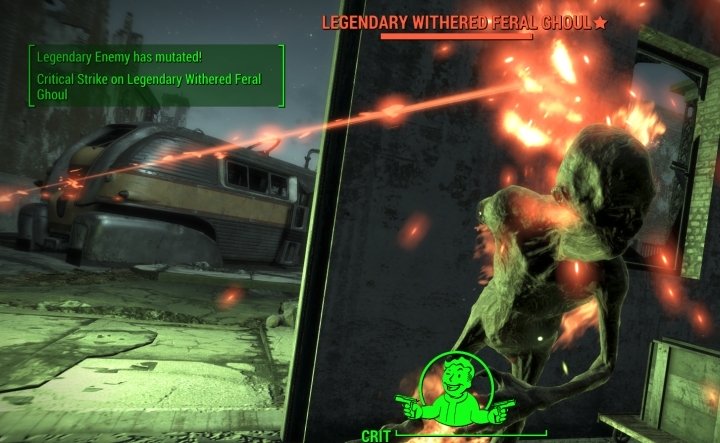 Only use crits when an enemy is near 50% if you are going to cripple a limb. The mutation will cause them to go back to full, wasting an otherwise powerful attack.
Legendary Mutation
Legendary NPCs who reach 50% life will mutate, causing their unique effects to kick in. For many enemies, this simply means they will now deal more damage. I didn't note any change in damage resistance, nor total life.
Damage seemed doubled or tripled when the enemy mutated in my testing. Therefore, a big tip I can provide for players fighting multiple legendary enemies at once is to NOT trigger the mutation on more than one at a time. Pick the target you eliminate most easily, and only trigger legendary mutation on that opponent.
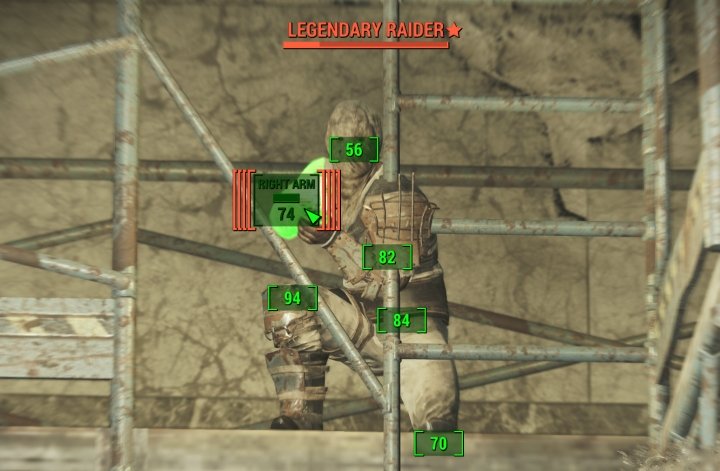 Crippling limbs is your main advantage when facing powerful Legendary enemies. Their health heals, but limbs are not restored to full health. Beware that some humans will use a Stimpack to heal!
Limbs Don't Heal
I have high hopes that this will not change in the future, but Legendary enemies have one major weakness. Though their life bar fills to full when they mutate, their limbs don't heal. This means that - depending on the opponent - you may be able to give yourself an advantage when they heal to full by having their limbs at half or even fully crippled. In fact some enemies you'd never be able to cripple due to them dying too fast are now viable targets for crippling - primarily with headshots. What limb you want to cripple varies greatly based on the opponent but, for humanoids, the arms are great targets. The reason for this is that I noted a greatly reduced firing rate when an enemy had crippled arms. Here are the effects humanoid NPCs have when crippled:
- Crippled Arms - reduced attack rate or aiming, hard to tell but noticeable. Good for mid-range attackers.
- Crippled Head - reduced aim. Excellent for long-range enemies with powerful weapons.
- Crippled Legs - reduced movement speed. Only useful for melee targets.
These are kind of different from the player's. You do suffer reduced movement, but your arms being crippled reduces your aim, while having a crippled head causes vision to distort, which may affect Perception or your own ability to target opponents at medium to long range. Crippling is independent of VATS usage - target an enemy's arm while aiming, and they'll take damage to that limb.
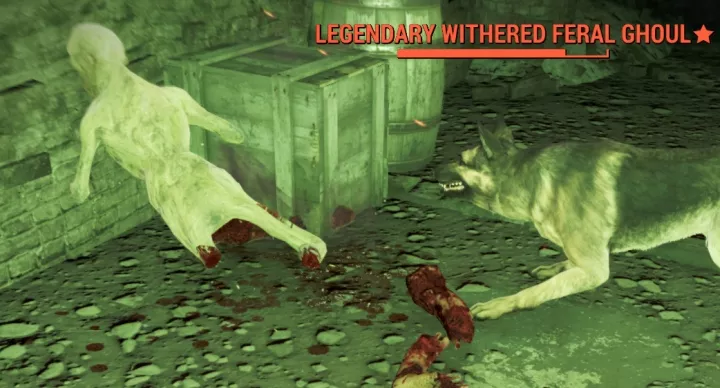 Only certain enemies, like ghouls, can have limbs completely blown off. Look for the health bar being empty on other types. Ghouls with no legs are very easy targets, though they'll still claw their way toward you if they can.
Use your best judgment on the many wasteland creatures you'll encounter. Ghouls have very weak limbs and blowing their legs off is a wise choice. You can actually remove all 4 limbs and leave them helpless. A deathclaw will be a bit slower with its legs crippled, as will yao guai and they are both primarily melee targets. Many smaller legendary opponents still do not have large health pools, but triggering mutation in a hard-hitting stingwing can be deadly!
Tip: Manage AP & Critical Hits
With no or little cover, it can be deadly to use your AP and trigger mutation with the last ounce of Action Points you have. It'd be better to hold off the mutation for when you've got full AP and can unload on them, unless you've managed to cripple them in a useful way or have strong aim outside of VATS. It is also better to save crits for after the Legendary enemy has mutated. Why? Any damage you deal in excess of the 50% will be healed. Only use a critical if you're going for a low % chance to hit to cripple a limb. I believe I've seen a couple of instances where I dealt damage in a single blow that completely killed one before it could mutate, but these are rare cases and my memory may not serve me on this.
More Fallout 4 Guides
Share Tips and Strategies Below
- Raider Outposts in Nuka World
- Nuka World - Play as a Raider in this DLC
- Far Harbor - Learn about the DLC, its secrets, and read walkthroughs
- Automatron - Guides to building bots and quest walkthroughs
- Settlements - An in-depth guide to Settlements and managing them
- Melee Build - the best perks for a melee character
- Sneaking - Learn to be stealthy
- Critical Hits - Shots to Crit and Crit damage mechanics
- Tips for Making a Build - General advice for creating your own build
- Action Points - AP and all the things that affect it
- VATS - all about the V.A.T.S. and AP usage on weapons
- Gameplay Tips - pointers that will help new players
- Making a Sniper Rifle Weapon mod examples. Heavy hitter and fast-firing Comparison - two guns from the same base.
Share Tips and FAQs (4)
Legendary opponents spawn much more frequently the higher your difficulty setting. They are very rare (half the rate) on Easy and appear 3x more often than normal on Survival. When it's Very Hard or Survival, there is actually a chance that you'll see more than one Legendary in a single group, and every 'group' or two will contain at least one.
Join In