- New - A guide to making a Pistol/Gunslinger Build
- New - A guide to making a Melee Build
- New - Scav Magazine - All locations and details
- For New Players - Read the walkthrough.
- New - Open Season
- New - Power Play Quest
- New - Raider Outposts
- New - Nuka World Endings Guide - Options and Benefits
- The Grand Tour
- Faction Perks and New SPECIAL Ranks in Nuka World
- Gage (Companion)
Fallout 4: Minutemen Main Quest Finale
Defend the Castle and The Nuclear Option Ending - as Spoiler-Free as Possible
 So you killed WHO??? If you've declined to work with, or have been kicked out of the Institute, you can finish Fallout 4 in 2 ways that i now of. Also, I've got help if you're stuck in the Institute after starting a fight with them, since you can't fast travel out.
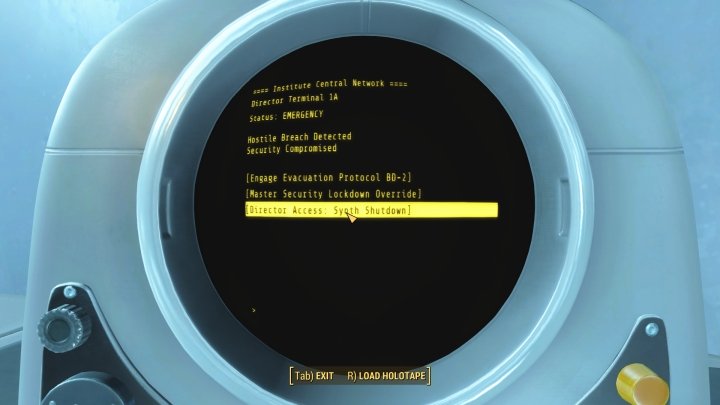
Stop reading now if you don't want to know anything about the end-game quests in Fallout 4. I'm going to try to avoid Spoilers, I think most people finding this page have got themselves into a spot and made enemies with the institute, or else declined to work with Father. If you've killed some Institute, got kicked out, and are stuck in the Institute and want to escape, head to the top floor using the elevator and run back to the room where you first teleported in. Just outside, there is a computer. Look to the right of the Terminal for a panic button, which will teleport you out.
One last Chance to Switch Factions for the Ending
Burning Cover
This quest opportunity only comes up if you have made an enemy of the Institution. Should you WANT to finish the game with the minutemen, I think you have to get kicked out of the Institute. Another quest may appear if you weren't working with the Railroad Faction. If you were working with the Railroad, they are now useless to you because you had the means of getting Synths out and ruined it by blowing your chance to deceive the Institute. Now you're presented with two options, as you SHOULD get the Burning Cover Quest, or another that leads to Preston Garvey. There are now only two options to complete the game. You can either:
- Speak to Preston Garvey to do Defend the Castle - This will initiate the Defend the Castle Quest, as the Institute will attack it. This implies you did the Minutemen quests up to that point. You can get to that point by doing quests and then you will get this option, or else:
- Work With the Brotherhood of Steel - to avoid explaining their whole ending to you, just know two things - it's possible you will lose Danse as a companion and the Railroad will likely become your enemy. Work on their quest line to finish with them. This guide assumes you will side with the Minutemen in order to keep as many factions friendly as possible, because you can continue to play after you finish Fallout 4. See the end of this page for other options after the Institute situation is 'handled'. Honestly, the Minutemen option gives you the most to do at the end of the game, the most available companions remaining, because it's fewer factions angry with you - but maybe you want an endless war for the XP and loot.
 Defending the Castle requires speaking to Ronnie to start the fight.
Quest: Defend the Castle
You'll speak to Preston, then head to the Castle if it's ready. Talk to Ronnie, and she'll indicate Synths have been spotted in the area. Be prepared for the hardest fight you've had thus far, and be sure to have plenty of healing items, possibly some drugs, and your best weapons and armor. It's worth using Power Armor for this, though on Hard I did it with Combat Armor and Ballistic Weave from working with the Railroad (fatigues and hat can give another 200 armor over your Combat Armor!).
 All enemies are leveled, so this will be a tough fight no matter how strong you are, though you should know to take out the easy targets first to eliminate their damage coming in. The minutemen are assembled and ready to help, and you can use artillery - just don't cause any friendly fire incidents!
Energy damage is most prevalent. You can use artillery in the distance to hit any Institute teleporting in, back around where you first test fired it. Coursers will attack at times, and use Stealth Boys. Weapons that ignite enemies can help you spot them, as can the fire of others - look for their beams coming out, and the Minutemen firing on them. The stealth only lasts so long, so go for head shots then. These guys are TOUGH, though the majority of Synths attacking are trash and go down with a few hits, there are also a few other types of high-level Synth that may take some punishment before being defeated. You may gain enough XP from this one battle to gain a level, and it is possible for Legendary Synths to attack.
The Nuclear Option
Minutemen Ending Steps
Talk to Sturges and he'll give you notice of a means to get into the Institute. This is the Minutemen version of this quest, the Railroad has something similar but not quite the same, because you should be friendly to the Institute and still have access to them if working Railroad.
 You'll have to jump into radiated water and deal with a lot of radiation until you're inside the Institute. Power armor is the best option, given there are a number of enemies inside.
You must gain access to the Institute via a sewer pipe - as far as I can tell, this requires either Expert Hacking or Locksmith, take your pick. This means power armor, or else a hazmat suit as there is a ton of radiation. The Power armor is a much safer alternative. You may have multiple sets - if you don't really want to fight in it, you could take one to leave once you're done with the radiation portion. I cast my misgivings aside and gave my Power Armor a Winterized Coating in order to boost Energy resistance, as that seems to be the main Institute damage type.
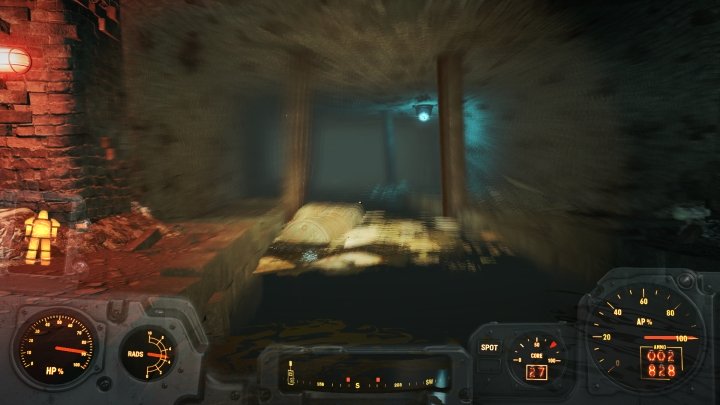
Approaching the pipe will seem weird. You tag this , yet you're going far from the Institute. Follow the marker on your compass, and jump into the water when you're clearly at the right spot. You'll find the Public Works Access Tunnel.
 Enter another pipe once you get in this room.
Breaking into the Institute
Now that you're out of the water, you can use the keypad to open the door, or else hack it with your Advanced or higher skill. This is just for some loot. You can go back into the water, into another pipe.
 Some hard-hitting turrets are in this tunnel - be warned.
Once you're at the bottom, watch out for the nasty laser turrets. Seriously, the hardest hitting I'd ever encountered, even with over 1200 energy resistance. Sheesh. You may fare much better if you're higher level - I did this on my main at level 38.
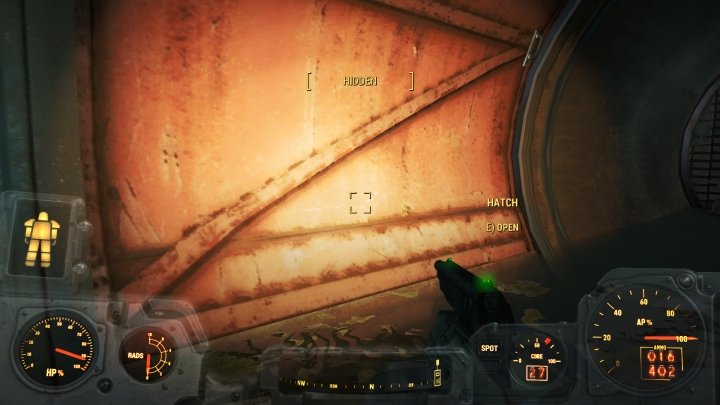 A hatch allows access, the most low-tech things guarding the Institute eggheads. It reminds me of the Death Star's weak point.
Find the hatch in the wall toward the end of the pipe. You'll face some monsters along the way - the pipe has an arrow pointing you in the right direction.... and they thought the Institute was smart. Anyway, you'll come across an Expert Terminal you can hack, but if you go a bit further there is another entrance for people who can't hack. The alternative is go to around and pick the expert lock - so do whichever your character is capable of.
 These Synths' conversation just goes on and on. Kill them to stop it, and enter an opening in the pipe, with the arrows guiding your way.
You'll encounter a pair of Synths. Kill them, then enter the pipe from the side after going down the ramp. The arrows continue to lead the way, but back into the radioactive water with you. Thankfully, that's it for this annoying, stinky sewer and you can finally run into their main complex. You're now free to take on the Institute!
 You're now officially inside the Institute, but things are about to get a lot more dangerous.
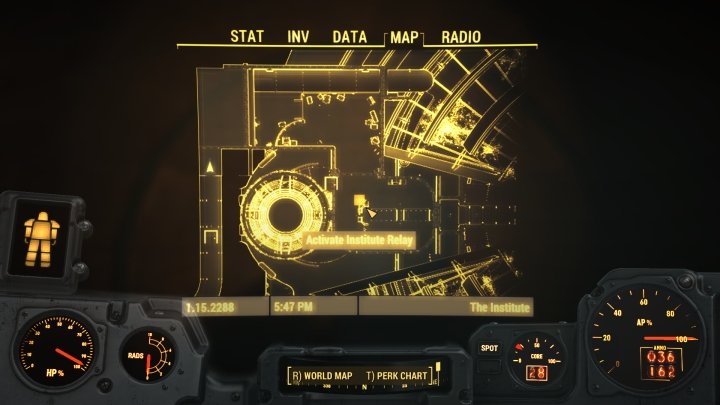
Look for a hatch to your right near the end of the pipe. You're now very near your objective, and it's about to be time to see the Minutemen shine... or else die in a blaze of glory. I highly suggest you save here. Use the terminal conveniently located, and load the Institute Relay Targeting Sequence Holotape onto it. Start the sequence, and your friends can teleport inside the complex. Now, speak to Preston Garvey.
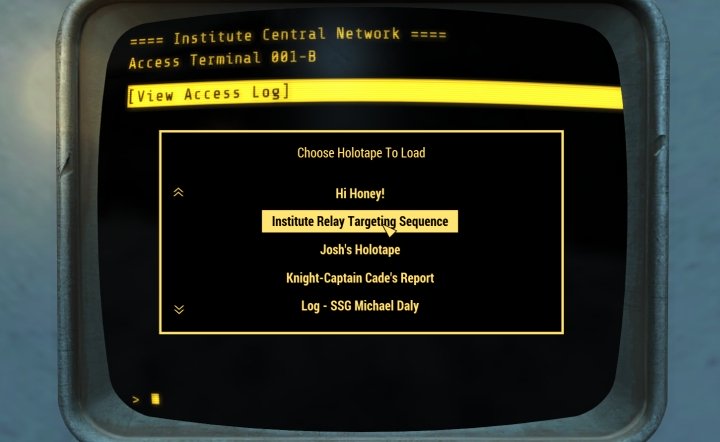 Load this holotape to let the Minutemen into the Institute to fight with you. It's required, because you don't have the bomb.
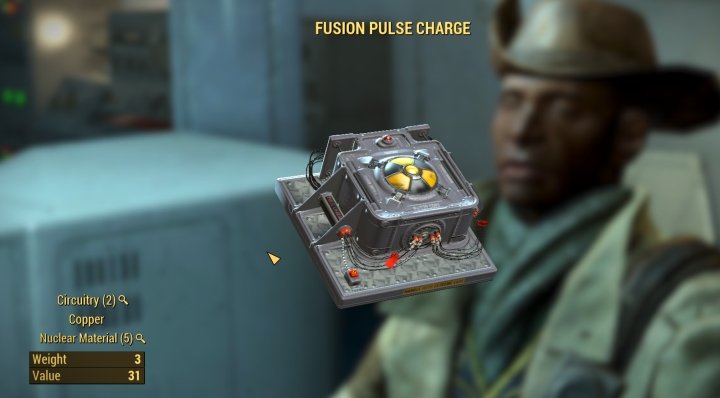 Garvey gives you the Fusion Pulse Charge, which is what we can use to bring down the Institute - hence The Nuclear Option.
Plant the Device and Issue an Evacuation Order (Optional)
Unless you want the Railroad to hate you, you'd better initiate that evacuation order. They don't give a damn about the humans in the Institute, they will just be miffed you offed a lot of Synths. You do this when you get to Father's office and his Terminal. Anyway, that's just a word of warning.. moving on!
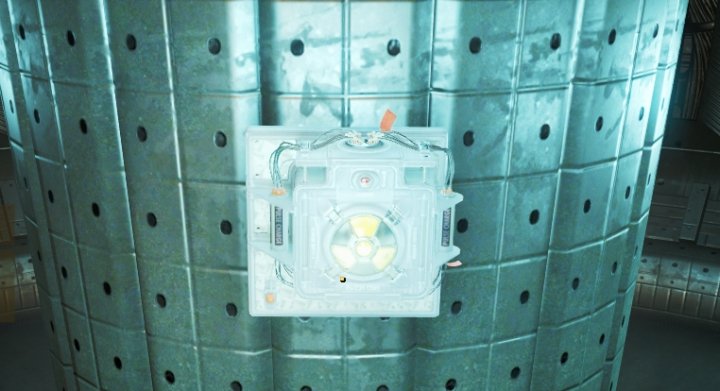
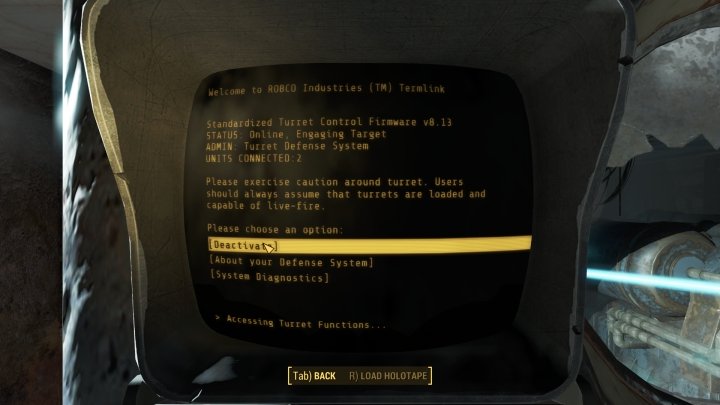 Taking this Terminal will allow you to disable 2 Turrets, protecting yourself and the Minutemen
In the next area, there's a terminal you can hack to disable a turret, which will free your guys to focus on the Synths inside the next room. If you don't have the skill, charge in guns blazing and you'll likely get what you want, a big battle. Not as bad as Defending the Castle.
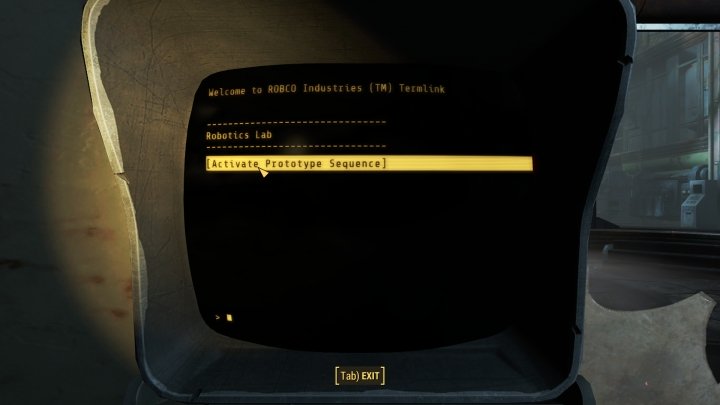 Activate the Prototype Sequence to have an ally (or another enemy once it handles the Synths. Regardless, it's a three-way fight and I recommend it. Just stay away when it's almost dead, the explosion is powerful.
Make Laser Turrets your top priority - their damage is high compared to the Synths, who could barely scratch my T-60 Armor. In the next area, you can use a Terminal to activate a prototype guardian sentry, which will make short work of the Synths or at least weaken them. When it's done killing, you can either finish it or actually just use the terminal again to shut it down! Please be aware these blow up in a spectacular explosion when destroyed.
 Inside Institute Bioscience, now things are more familiar. The scientists don't really want to fight your squad.
Inside the Institute Main Building
Now, you're in Institute Bioscience and things should look MUCH more familiar. Fight your way to the main entrance (near the elevator), where an even bigger firefight will ensue. Thankfully, many of the civilians want to avoid combat, or else it'd be overwhelming (trust me I tried killing them all by myself, kind of reminded me of Skyrim). Anyway, the marker is clear - you need to get to Advanced systems, but it's locked.
 Give the evacuation order, disable the security override, and shut down a few synths using Father's terminal.
Use the elevator, which will go down this time. Push the button and press on. You will reach Father's quarters, where you can possibly talk to him if he's alive, put a bullet in his head, up to you. Point is the terminal. You've got three choices there - do all 3 if you want things perfect. Issue the evacuation order, disable the security override, and shut down synths - thankfully, just the security Synths.
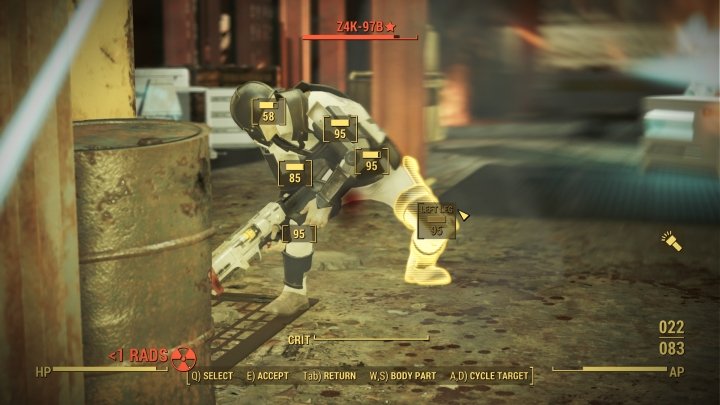 The fight inside Advanced Systems can be tough, with 2 Legendary Synths and scientists/turrets shooting at you and the team.
This makes the rest of the mission go much more smoothly, though the fighting's not done yet. Head into Advanced Systems, slowly chewing through the Synths that continue to fight. Once you reach the reactor area, watch for a row of nasty turrets and hit them in VATS to make short work of them. Inside, you can at last plant the charge, but first must deal with scientists, and a couple of legendary Synths. Be sure to loot them! They have the password.
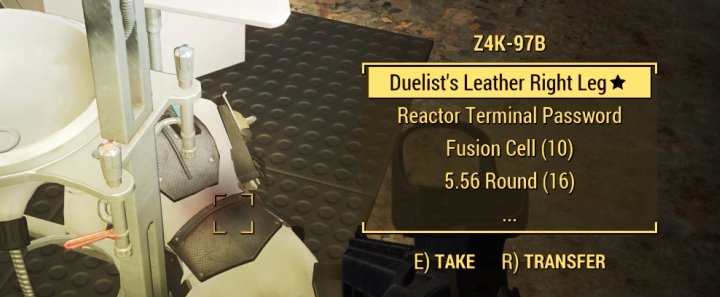 Kill the Legendary Synths to get the Reactor Terminal password, then use it and finally plant the bomb.
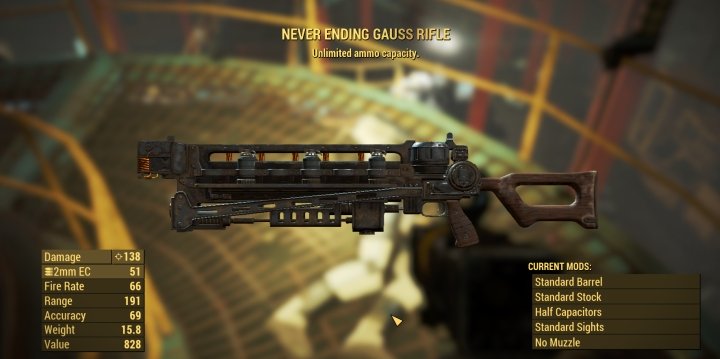 This was a pretty lucky drop, or else everyone get it. Let me know!
A good strategy is to get the scientists and turrets killed early so that you reduce incoming firepower. You must kill the legendaries in order to get the terminal password, which is near the reactor. Once that's done, there's no further pressure., because there is no timer - the bomb is activated remotely.
 Finishing Fallout 4's Nuclear Option quest this way gives you the Minutemen Ending, but you are now free to go piss off factions or supermax your character without worrying about the main quest.
Get the Minutemen Ending
Just one loose end to tie up. Before teleporting, you're faced with a choice. It will not have a bearing on your standing with Factions, though it does change things a bit. Preston will hate it if you decline, if you care.. I will leave that up to you. If you issued the evacuation, the Railroad won't hate you - the Brotherhood are ignorant of it, so you're free to work for these factions for the foreseeable future and max out your character as much as you like.
But What's Next for You in Quests?
If you at any point get kicked out of the Brotherhood, you could seek the help of the Railroad or Minutemen to take them on. The same likely applies to the Railroad, although the Brotherhood are probably the only ones to help. These have their own unique, interesting quests that you can undertake so once you're sure which factions deserve to stay in the Commonwealth, consider getting yourself removed from someone (save first) and seek help of the others to remove them and get the rewards and loot that come with that.
More Fallout 4 Guides
Share Tips and Strategies Below
- Raider Outposts in Nuka World
- Nuka World - Play as a Raider in this DLC
- Far Harbor - Learn about the DLC, its secrets, and read walkthroughs
- Automatron - Guides to building bots and quest walkthroughs
- Settlements - An in-depth guide to Settlements and managing them
- Melee Build - the best perks for a melee character
- Sneaking - Learn to be stealthy
- Critical Hits - Shots to Crit and Crit damage mechanics
- Tips for Making a Build - General advice for creating your own build
- Action Points - AP and all the things that affect it
- VATS - all about the V.A.T.S. and AP usage on weapons
- Gameplay Tips - pointers that will help new players
- Making a Sniper Rifle Weapon mod examples. Heavy hitter and fast-firing Comparison - two guns from the same base.
Share Tips and FAQs (4)
Join In